Tuesday, 29 October 2013

Amateur Nail Art: Halloween!

Today I have done something for Halloween.  I usually don't decorate my nails for Halloween but I have the stamps, so why not?  I'm not going to comment too much because it was just for fun.

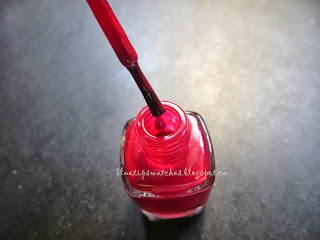
My fingers but my ring finger is painted with 2 coats of Revlon Colorstay Stiletto 
Ring finger is painted with 2 coats of L'Oreal i will!  

The Revlon Stiletto is very shiny but I feel like it took a while for it to dry, so I ended up getting all over myself (smudging...I am an amateur)

For the ring finger, I went over with Nicole by OPI Make a Comet-ment

It was pretty hard to capture this but it was pretty!

The rest of the fingers painted with Revlon Galaxy (this is pretty sheer, or I couldn't get the bigger glitter chunks to my nails. So I did 2 coats).


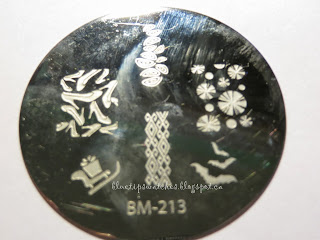
I stamped my ring finger with Konad stamping polish in black and used the BM - 213 plate for the bats

I should have taken a picture of this before I used it.  I forgot and this is the result.  I cleaned it with nail polish remover afterwards.

My finished look!


I have to say, I listed a lot of polish, and I feel like I put a lot of polish on.  Each finger had at least 4 coats of polish in addition to the base and top coats.  Thick layers too, so it's not like it was thin.  This is probably the reason I had drying issues.

Overall, I like it, I think it's pretty fun.  What I like about the black with the glitter is, it looks like it's outside.

I bought all these polishes awhile ago, for nail art purposes.

Essie: Carry On

I have a vampy colour today.  As I mentioned in another post, I was looking forward to wearing a darker shade just because we're in October right now.  I decided to go with Carry On this week.

Carry On was part of the Essie Fall 2011 Collection and was the namesake of the collection.  The collection was inspired by bags. I might just own all the colours except for one of them.  This was when I was first getting into collecting polishes, or if not collecting on purpose, I started to buy a variety of colours.  Before I would stick to a few.  Even though I bought it in 2011, I never wore this colour before.  I only started to wear vampy colours this year.  I feel like I've been missing out, but I'm glad I have this in my stash.

Thoughts
The polish is a creme and it was very easy to apply.  It was not streaky on the first coat, which can happen with Essie polishes.  Also, I noticed that it dried with a nice shiny finish.  The colour is between a rich burgundy or a deep raisin.  I kept thinking it was a wine colour.  In dim lighting it looks black.  My favourite thing about this polish is that it dried evenly.  My other experiences with the darker reds, I ended up with some batches, and this wasn't the case here.


Breakdown
Basecoat: Seche Base
Colour layer: Essie Carry On (2 coats)
Topcoat: Seche Vite

Brush shot


I bought Carry On two years ago.  I must have bought it at Shoppers Drug Mart and probably for $9.99.  Carry On is still available at nailpolishcanada.com.

Sunday, 27 October 2013

Essie: Butler Please

I love this blue.  This is one of the shades I really like.  A bright blue.  My two favourite lazy day clothes is this colour.

Thoughts
The formula is similar to the other Essie cremes.  The first coat covered, but I think I was painting with more paint on my brush since I was trying a different technique.  Some of the coats were still streaky.  By the second coat, it was even.  The formula does not dry shiny, it kind of looks dull actually. After the top coat, it looks a lot better.  

I ended up taking it off because I realized that I might not want to wear this colour for a work week.  It didn't stain my nails when I removed it.  


Breakdown
Basecoat: Seche Base
Colour layer: Essie Butler Please (2 coats)
Topcoat: Seche Vite


I bought this at Shoppers Drug Mark during a sale for $6.99.  Usually it retails for $11.99.  

Friday, 25 October 2013

Essie: Head Mistress

I was curious how this would look.  I was also looking forward to wearing a vampy colour.  It's a little darker in real life, but the pictures capture this as red.  We all know I'm not big on wearing reds.  I have nothing against wearing red, I think I'm just not used to seeing red on my fingers.  My comfort zone are cold colours.  A small story to share.  I was telling a friend how red was so eye catching and I would like to not be so obvious, which is why I stick with cool tone colours (green, purple, blue).  Then she pointed out that red is a classic colour that probably started it all.  So in fact all the colours I wear are eye catching because they are not as accepted as red.  She has a point.  I think this blog and blogging about swatches as allowed me to get out of my comfort zone, and I'm wearing more colours that I own but probably wouldn't have worn.  I don't buy reds, I probably have only bought two reds in my collection.  Usually I'll buy pink or hot pink but red is different.  I received this for free as part of my win of the EXPRessie contest last year on instagram.


Thoughts
The formula is similar to that of Skirting the Issue.  It's a creme but the application was pretty smooth and water like.  It's buildable, I'm pretty sure if you added more layers, it'll become a bit more darker?  The polish is very shiny and pretty.  I accidentally hit my nail on something before it was completely dried so it smudged.  I removed the polish from that nail only so that I could fix it, but it stained a bit.  For me, staining is more like when I remove it, there's some residue left over, and I have to go over my nail with a nail polish soaked cotton pad once more.  

This could be that it wasn't completely dried but it wasn't wet either.  I do like the finish look a lot though, so this will become the red shade for me.

Breakdown
Basecoat: butter London Nail Foundation
Colour layer: Essie Head Mistress (2 coats)
Topcoat: butter London Hardwear


I didn't pay anything for this since I won it from a contest.  It is still available at nailpolishcanada.com if anyone is interested.  My bottle has 13.5 mL

Tuesday, 22 October 2013

Dior: Destin

When I first saw Dior's Destin in photos, I knew I had to have it.  I first saw it at Shoppers Drug Mart near my gym.  The display was high on the shelf, so I wasn't sure if they were changing displays or if they were sold out of the colour already.  This was early August, and I haven't worn it yet because I wasn't over the bright colours of summer.  This colour is also available at Sephora. The good thing about Sephora is, you can swatch the colour.


Thoughts
Destin is such a pretty colour.  It also is very office friendly.  The colour is a taupe metallic and it has pretty white metallic shimmer.  It looks pretty fancy.  The formula is thick and covers really nicely in two coats, you can do one coat but I decided to even it out by adding a second coat.  The brush is a pro-wide brush, and it's pretty stiff, so control is pretty good.  

From the bottle, I expected it to be more of a pinkish even though I knew it was a taupe.  The taupe is very pretty though.  It dried darker on me than I expected.  This is where I was expecting it to be more pink.  There is visible brushstrokes but I don't think they are too obvious to make you appreciate this colour any less.  

I painted my nails on Sunday and by Tuesday, the tips of my nails started to show.  Which, is fine with me but by Wednesday, my pointer fingers were having cracks on the polish.  I'm not sure if it's my base and top coat but this chipped pretty quickly.  Love the colour, I don't like how it chips. 

Breakdown
Basecoat: butter London Nail Foundation
Colour layer: Dior Destin (2 thin coats)
Topcoat: butter London Hardwear


I bought Destin at Shoppers Drug Mart for $24 and it is C$25 at Sephora.  The bottle contains 10 mL (0.33 FL.OZ)

Saturday, 19 October 2013

Comparisons: Base and Top coats

I have something a little different today.  I wanted to share the base and top coats I own.  I just want to say that I'm not an expert on base or top coats.  I just have simple wants, and that's really the reason I started using base and top coats.  When I was younger, I always thought base and top coats were a waste of money.  Just because they are clear and cost the exact same amount as a coloured polish.  I also thought it was some marketing gimmick.  

I finally decided to buy a bottle of a base and top coat when I decided to wear darker colours.  Before I was wearing lighter blues, pinks or some shimmery colours.  So staining wasn't a concern for me.

Right now, I can honestly say that none of my friends use a base or top coat.  Only people who get the occasional manicure use it.  I found that interesting, especially if the person was going to use dark colours or glitters. The reason I received for not applying base or top coats is because it's too time consuming.  Which can be true, but I guess it depends on the person.

Anyway, I will continue with my post.

Base coat benefits:
  • Prevents nail staining and peeling
  • Protect your nails
  • Colour polish sticks on the base coats pretty well and makes your manicure last longer
Top coat benefits:
  • Adds a shine to your manicure
  • Prevents colour from chipping = manicure should last longer

I usually wear my manicure for a business week, so I paint my nails Sunday night, and usually take it off by Friday or Saturday.  If I become tired of the colour, it can be earlier in the week.  For me, I find no matter what type of top coat I use, my pointer and pinky are the first to chip.  I guess I use my pointer fingers a lot in general because this is the same whether I am at work, or am on vacation.  Usually it's the outter corner that chips on both hands.  

Other things I usually do for top coats is, I try to wait until the polish has dried, just in case applying the top coat causes dragging or, some of the polish gets on my brush.  Maybe for this reason, I have a bottle for glitter/shimmer finishes or for non-glitter/shimmer finishes (this is for Seche Vite only).

Revlon: Multi Care Base + Top Coat


I bought this bottle of Revlon in the beginning of using base and top coats.  I was thinking how wonderful it was to have a two in one.  As a base, it's very sticky, so that's pretty good.  As a top coat, it's pretty sticky.  I noticed that I wasn't really into using this anymore.  Although it dried in a non-sticky way, I just noticed that it did get quite thick near the end, and I basically used it just to finish using it (this bottle is empty, yay!).  There are other Revlon base and top coats that are not a two in one.  I have tried the base, which worked fine but I never bought a separate top coat to try before.


Nicole by OPI: Base Coat Plus and Top Coat Plus


I bought these Nicole by OPI base and top coats during a sale.  I thought it was such a good deal.  The base coat is a sticky base.  I have finished this now.  If you have read my other blog posts with the nail colours, I have use this base quite often because I wanted to finish it.  There was a period I was applying and removing polish quite frequently.  Upon removal, there's no staining but I think overall, my nails are a little yellowed from all the polish I wear.  This can be a normal thing.  I don't think my nails have grown to be yellow because I can definitely see the line of brand new nail that is my nail colour and the growing out part that is a bit yellowed from all the previous applications.  For creme polishes, this base wasn't bad, it would remove without staining.  Glitter polish is very difficult to remove, so I don't think it's this base.

Top Coat takes a very long time to dry.  I'm not a fan of the top coat, which is probably why I was able to finish the base with no problems or dislike, but the top coat is still a full bottle.  I bought the Nicole Drying Drops on sale for C$5.99 to see if that would help.  It helped a little but not by much.

Does this pass the "I painted my nails right before going to bed and my nails were perfect when I woke up" test: No.  After I made sure that my polish seems to be solid to the light push, I go to bed (like giving it about 30-60 minutes).  Only to wake up with prints on my nails from my sheets.  This would be fine if that was what I was going for.  This has happened twice.

The base and top coat are available at most drug stores, Walmart and Target.  Retails for around C$9-11.

UPDATE: Nicole by OPI has updated their base and top coat bottles.  I think there additional base and top coats available.  For example like a matte, and a fast drying.

Sephora by OPI (no longer available)

(I just noticed that I photoed the top and then the base coat)

I received these as part of my 500 point redemption at Sephora and it came with a mini colour.  Since Sephora by OPI is no longer available, I'm only adding this for informational purposes.  I'm not really sure if this will help anyone who liked the base and top coat for Sephora by OPI.  I can only compare it to the Nicole by OPI.

The base coat was sticky.  I think Nicole by OPI's base is more sticky than this one.  I also want to add that I found that the top coat dried pretty quickly.  Maybe the total dry time was about 10 minutes?  Not bad.  

Does this pass the "I painted my nails right before going to bed and my nails were perfect when I woke up" test: I don't know.  I painted my nails late in the evening but it wasn't time for bed yet and they have dried.  


Seche Base and Seche Vite


I recently bought Seche Base at Winners for C$6.99.  I used it twice now.  The base coat is cream and there's a bit of pearl shimmer.  This has a very strong smell.  I thought Seche Vite was strong, this is stronger.

Seche Vite is my favourite top coat.  I have recommended this to one of my other friends who was complaining about dry time and she loved this!  What I love about Seche Vite is that it dries very quickly and it gives my manicure a beautiful shine.  Like super shiny and it makes my manicure last very long.  I never question that I can give my manicure at least a week wear and my pedicure around three weeks.  The thing about Seche Vite is, it has a very strong smell.  It comes with a scary warning label for pregnant mothers in the State of California.  My main problem with Seche Vite ( I'm sure many people have already mentioned this) is how it's beautiful at the beginning but as soon as you hit the middle of the bottle, it becomes very thick.  So thick that when you apply it, there are top coat thread strings that follow the top of the bottle to your nail.  

Does this pass the "I painted my nails right before going to bed and my nails were perfect when I woke up" test: Yes.

Does it offer a gel like finish: Yes and that is not part of the claim but to me, I feel like I just got a gel manicure.  Other people have asked me too. 

I buy Seche Vite from Winners for C$6.99, and it retails for C$10.  I've read other reports about the middle  bottle thick problem, so I don't think it's because I buy it from Winners.


Butter London

Nail Foundation dries matte on the nail.  I wore a-England's Sleeping Palace, and I think I tried my best at painting my nails.  After six days of wear, there was no staining.

The Hardwear dries really quickly.  I think about two minutes after applying my polish it was pretty dry to the gentle touch.  By five minutes, it was completely dry.  By the second or third day I did see my manicure starting to chip.  By the fourth day, my pinky had a bit of a bigger chip chunk come off.  I haven't used Hardwear long enough to comment whether it thickens as it gets used.  I will have to provide an update in the far distant future.

Butter London's Nail Foundation and Hardwear are pretty expensive as it retails for C$21.00 or as a set it is C$29.00.  I bought mine as part of the Backstage Basics Sets which was $C46.00 with a nail colour, a small bottle of Powder Room nail polish remover and a file (I wanted to try the polish remover, so I thought this set was pretty good value but it's about the same as buying the base and top coat set, and colour polish).

Does this pass the "I painted my nails right before going to bed and my nails were perfect when I woke up" test:  Yes

Does it offer a gel like finish: No and it's not part of its claims.


Essie

I am not currently using any thing from Essie at the moment for base or top coat which is funny since I have so many Essie polishes.  I thought I would mention that I did previously used Essie's All in One Base.  The All in One Base is a base coat, top coat and a strengthener.  Which was great in protecting my nails from staining.  The only thing is, it also didn't stick to my nails well.  This is the first time that it was so easy for me to peel my polish off, even if I used Seche Vite as my top coat.  Also it felt like my polish colour didn't want to stick to the base coat.  If I wasn't going to paint my nails with a colour, I would consider using this.  I haven't used any of the top coats from Essie but I might try that once I'm finished all my current top coats.

I hope this was helpful for you in choosing your base or top coat!

Wednesday, 16 October 2013

Comparisons: Fall Blushes

Canadian Thanksgiving was yesterday and I ate so much over the last few days.  So delicious.  During the weekend, I've tried to update my tags for easy access to any previous post and for better organization.  I was also able to write a few more reviews during the weekend.  

I went to Sephora in mid-September to check if they had Illamasqua's Facet.  Even though I did the China Glaze post, I clearly still wanted it.  So I decided to see if it was available at the mall.  It wasn't.  Instead of having the Sacred Hour polishes, Raindrops and Pink Raindrops were available.  Anyway something had caught my eye.  I bought the Illamasqua Velvet Blusher in Sleek.  So I wanted to share my fall blushes.

Illamasqua: Velvet Blusher in Sleek

Sleek is described as a dusty coral.  Originally I was going to try the other colour, Peaked, which was a dusty rose.  When I saw it at Sephora, I realized that Sleek was more to my liking and probably fit the type of look I go for.  Plus, I love/prefer orange/coral tones anyway.  

I don't own a lot of cream blushes, I own the mousse blush from Maybelline, so I was curious how velvet blusher would be.  Anyway, it starts off as a cream and when I brush it on my face it's more of a powder.  I imagine cream blushes to be more sticky.  I do like that this is a more transitional colour to fall compared to my other coral/orange blushes.  I applied this with my finger since I don't know what type of brush I would use.  I could use a foundation brush but I just haven't tried that yet.  What drew me in was the fact that this is a matte blush.  I have a lot of shimmery blushes.

I wasn't planning on posting about this, so I went ahead and used it a few times first before taking pictures.  Afterwards, I decided I would make a mini-post about fall blushes.  Also because I was pretty excited to receive this.  I do admit it is on the pricier side. C$32 for 5g (0.18 Oz).

Packaging

The blush itself.  Very easy to apply and it wasn't messy that there was powder going all over but it was on my finger since I didn't use a brush.

Swatch of Sleek

Swatch of Sleek on the left and blended out on the right

Other fall blushes I'm very excited about.

I bought these Tarte Amazonian Clay blushes last year.  After discovering Exposed, I bought a lot more Amazonian Clay blushes because I was really impressed by Exposed.  From the swatches, you can see that I haven't really broken into using these but I am excited to wear these.  Both are shimmery, powder blushes.  These blushes go for C$31 for 5.6g (0.20 Oz.).

Left: Dazzled Right: Blushing Bride

Left: Dazzled Right: Blushing Bride

Close up of Dazzled

Close up of Blushing Bride

Blended out swatches with swatch of blushes. Left: Dazzled Right: Blushing Bride

Thanks for reading my random post on the blushes I'm looking forward to using.